10 Montessori Inspired Baby Toys You Can Make From Cardboard
Let’s get real. You see those beautiful, minimalist wooden toys all over Instagram with the #Montessori tag, and then you see the price tag and your jaw hits the floor. $50 for a set of blocks? $75 for a simple puzzle box? It feels like you have to choose between your baby’s development and your budget. That’s a myth, and we’re here to bust it.
Forget the fancy boutiques and the pressure to buy. The true spirit of Montessori is about fostering independence and learning through simple, purposeful materials. And what’s simpler or more purposeful than the humble cardboard box? You’re about to discover how to transform that pile of Amazon boxes in your garage into a treasure trove of engaging, developmental toys that your baby will love—and your wallet will love even more. This isn’t just about saving money; it’s about reclaiming your power as a parent. You don’t need a six-figure salary to give your child a brilliant start. You just need a box, a pair of scissors, and the know-how in this guide.
The Cost Breakdown: DIY vs. Store-Bought
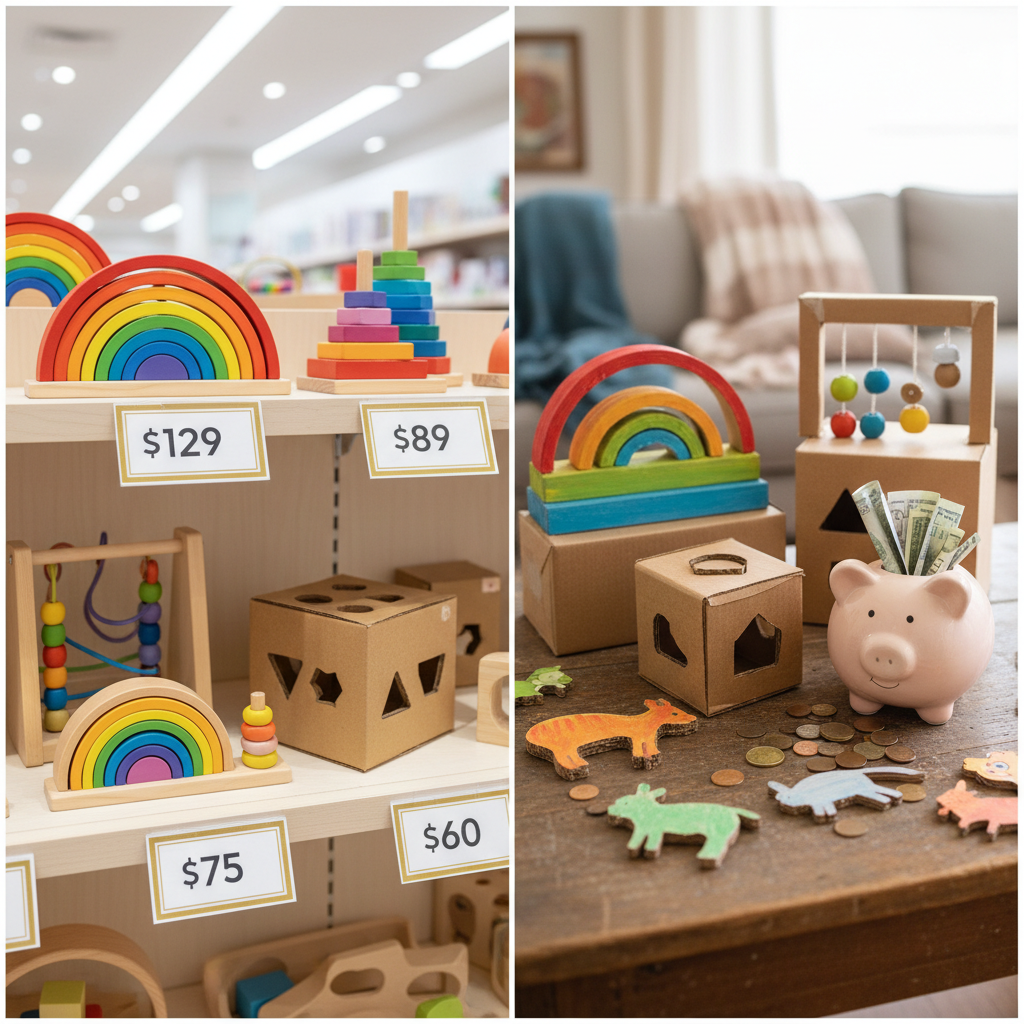
Before we dive into the projects, let’s look at the cold, hard cash. The numbers don’t lie. Spending a fortune on brand-name toys is a choice, not a necessity. When you see the savings laid out like this, the decision to go DIY becomes a no-brainer. You’re not being cheap; you’re being smart. That’s money that can go towards savings, groceries, or your own side hustle. Peep the math below.
| Montessori Toy | Typical Store-Bought Price (Wood) | DIY Cardboard Version Cost | Your Savings |
|---|---|---|---|
| Object Permanence Box | $30 – $45 | ~$0.50 (for non-toxic paint, if used) | ~$44.50 |
| High-Contrast Mobile | $25 – $60 | $0 (using household items) | ~$60.00 |
| Shape Sorter | $20 – $35 | $0 | ~$35.00 |
| Stacking Rings | $15 – $25 | $0 | ~$25.00 |
| Lacing Cards | $12 – $20 | $0 | ~$20.00 |
| TOTALS | ~$102 – $185 | ~$0.50 | ~$184.50 |
Yeah, you read that right. You can save nearly $200 by creating just five of these toys yourself. Imagine what you could do with that extra cash. Now, let’s get to work.
The Frugal Toolkit: Gear Up for (Almost) Free
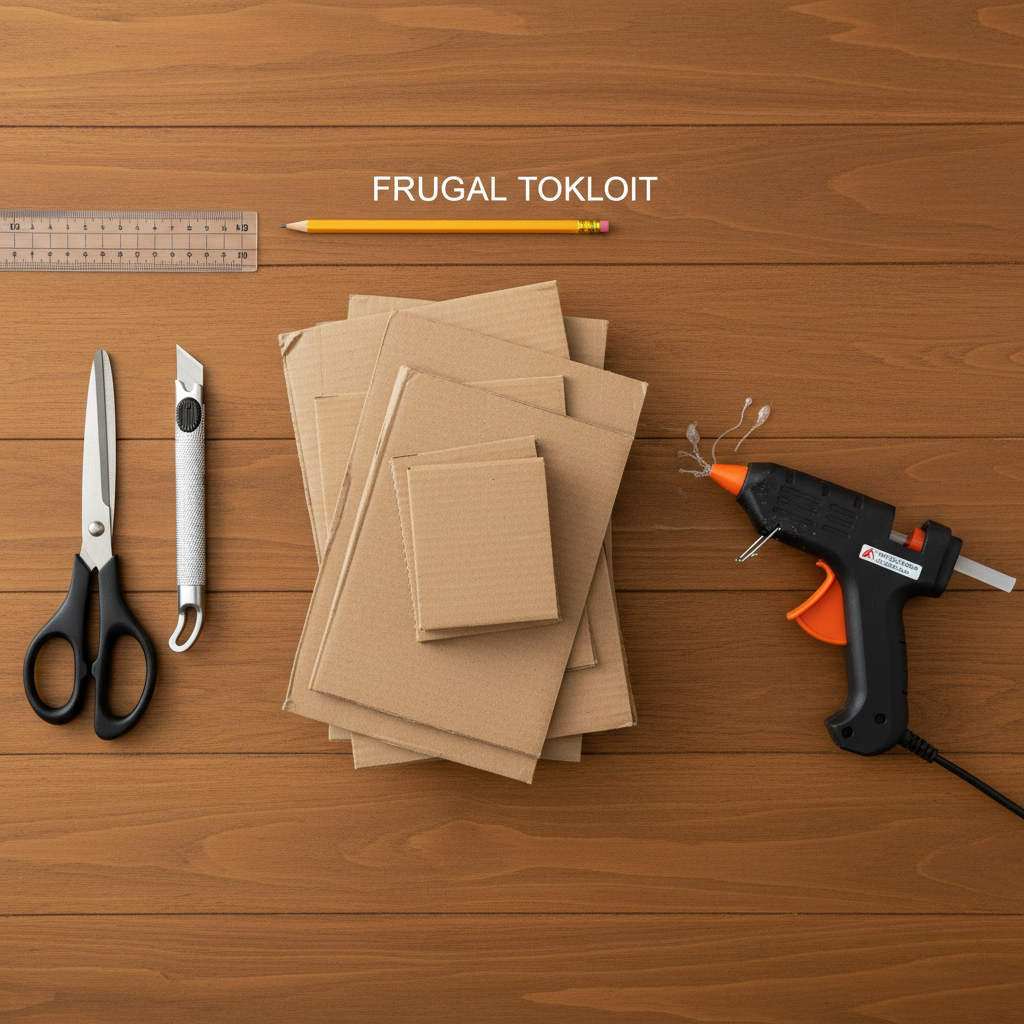
You don’t need a fancy workshop. Most of what you need is probably already in your house, waiting to be upcycled. This is about resourcefulness, not retail.
- Cardboard: The star of the show. Start saving shipping boxes, cereal boxes, and shoe boxes. Look for varying thicknesses. Corrugated cardboard is great for sturdy construction, while thinner cardboard from food packaging is perfect for details.
- Cutting Tools: A sharp pair of scissors and a good craft knife or box cutter (for adult use only!). A metal ruler helps with straight cuts.
- Adhesives: Non-toxic hot glue is your best friend for strong, quick bonds. A non-toxic glue stick or white school glue works for lighter pieces.
- Measuring & Marking: A ruler and a pencil or marker are all you need.
- Optional Bling: Non-toxic, baby-safe paint (look for water-based acrylics) or markers can add a pop of color. Sandpaper can smooth rough edges. Shoelaces or thick yarn work perfectly for lacing toys.
Key Rule: Safety First, Always.
Since these toys are for a baby who will absolutely put them in their mouth, safety is non-negotiable. Ensure all small parts are securely attached. Supervise play. Use only non-toxic materials, and check toys regularly for wear and tear. If a toy starts to break down, toss it in the recycling and make a new one—it’s free!
Phase 1: Toys for Tiny Hands (Ages 0-6 Months)
At this stage, it’s all about sensory development and simple motor skills. Babies are working on focus, tracking objects, and grasping. These first three toys are simple to make but pack a huge developmental punch.
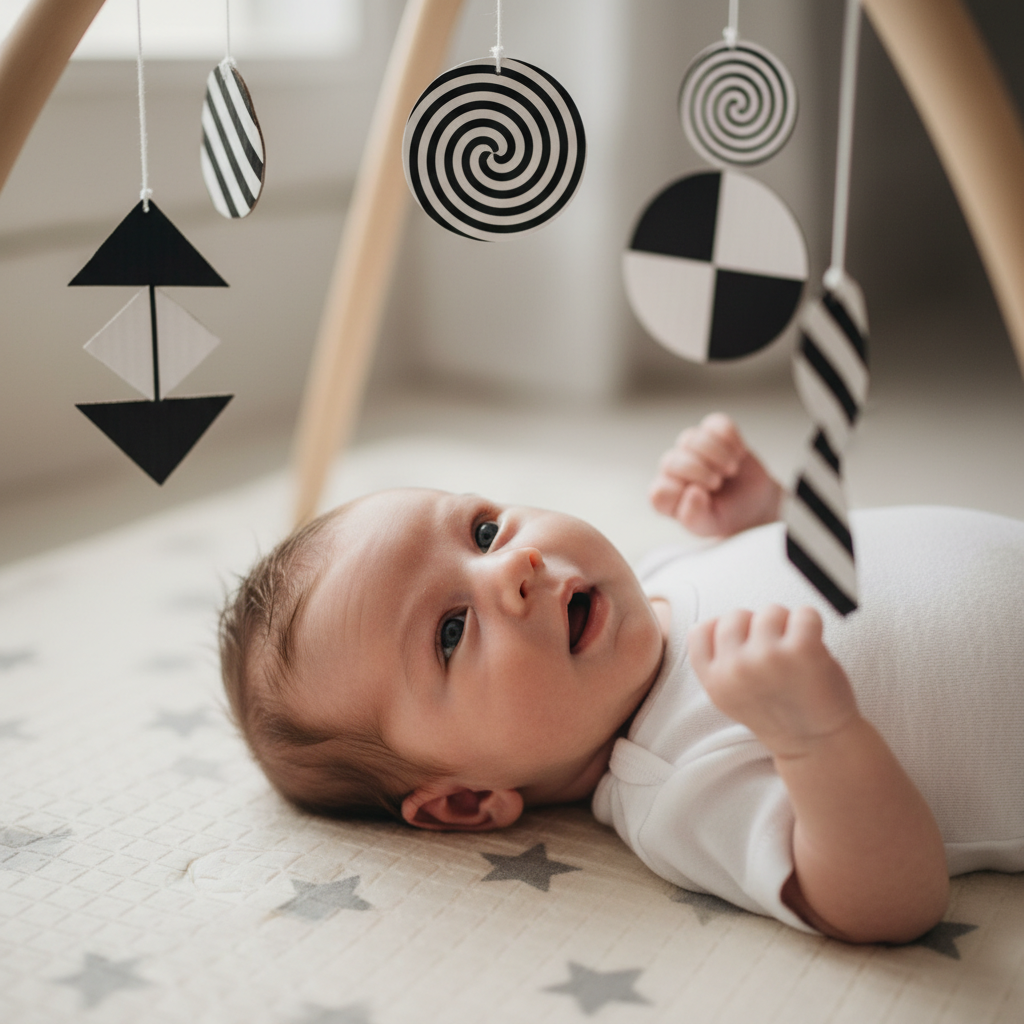
1. High-Contrast Mobile
Newborns’ vision is still developing, and they are drawn to high-contrast black and white images. This mobile helps them practice focusing and tracking objects.
- Materials: Thin cardboard (cereal box), black and white non-toxic markers or paint, string, a stick or wooden dowel/hanger.
- Cut out several simple shapes from the cardboard (circles, squares, spirals). Aim for about 3-4 inches in size.
- Color them with high-contrast patterns. Think bold stripes, checkerboards, simple geometric faces, and bullseyes. Make them double-sided.
- Poke a small hole in the top of each shape.
- Cut varying lengths of string and tie one to each shape.
- Tie the other end of the strings to your stick or hanger, balancing them so they hang freely. Hang it securely about 12 inches from your baby’s face over their changing table or play mat (never over the crib for safety).
2. Grasping Rings
This helps your baby practice their grasping reflex and hand-eye coordination. It’s the ultimate simple object.
- Materials: Sturdy corrugated cardboard.
- Trace a large circle on the cardboard (like the outside of a roll of packing tape).
- Trace a smaller circle inside the first one, leaving a ring about 1-inch thick.
- Carefully cut out the ring using a craft knife. For extra durability, cut out 3-4 identical rings.
- Glue the rings together to create one thick, sturdy ring.
- Use sandpaper to smooth any rough edges so it’s comfortable for tiny hands and mouths. Leave it plain or paint with non-toxic, baby-safe paint.
3. Sensory Panels
These panels provide tactile stimulation, encouraging your baby to explore different textures during tummy time.
- Materials: Several 6×6 inch squares of corrugated cardboard, hot glue, various textured materials (fabric scraps like corduroy or silk, bubble wrap, crinkly plastic, sandpaper, cotton balls).
- Cut your cardboard into uniform squares.
- Using non-toxic hot glue, securely attach a different textured material to each square, covering the surface completely.
- Ensure all edges of the materials are glued down tight so nothing can be pulled off.
- Place the panels on the floor during tummy time and let your baby touch and feel the different surfaces.
Phase 2: Toys for Curious Crawlers (Ages 6-12 Months)
Now your baby is on the move! They’re starting to understand cause and effect and the concept that things exist even when they can’t see them. These toys are designed for little problem-solvers.
4. Object Permanence Box
This is a classic Montessori toy. It teaches babies that objects still exist when they disappear from sight. A store-bought one costs a fortune; yours is free.
- Materials: A small, sturdy cardboard box (like a shoebox), a craft knife, a small ball that fits in your baby’s hand.
- Cut a hole in the top of the box lid, just slightly larger than the ball.
- On one of the sides of the box base, cut a larger opening that the ball can easily roll out of and that your baby can reach into.
- Assemble the box. That’s it. Seriously.
- Show your baby how to drop the ball in the top hole. Watch their amazement as it disappears and then reappears out the side.
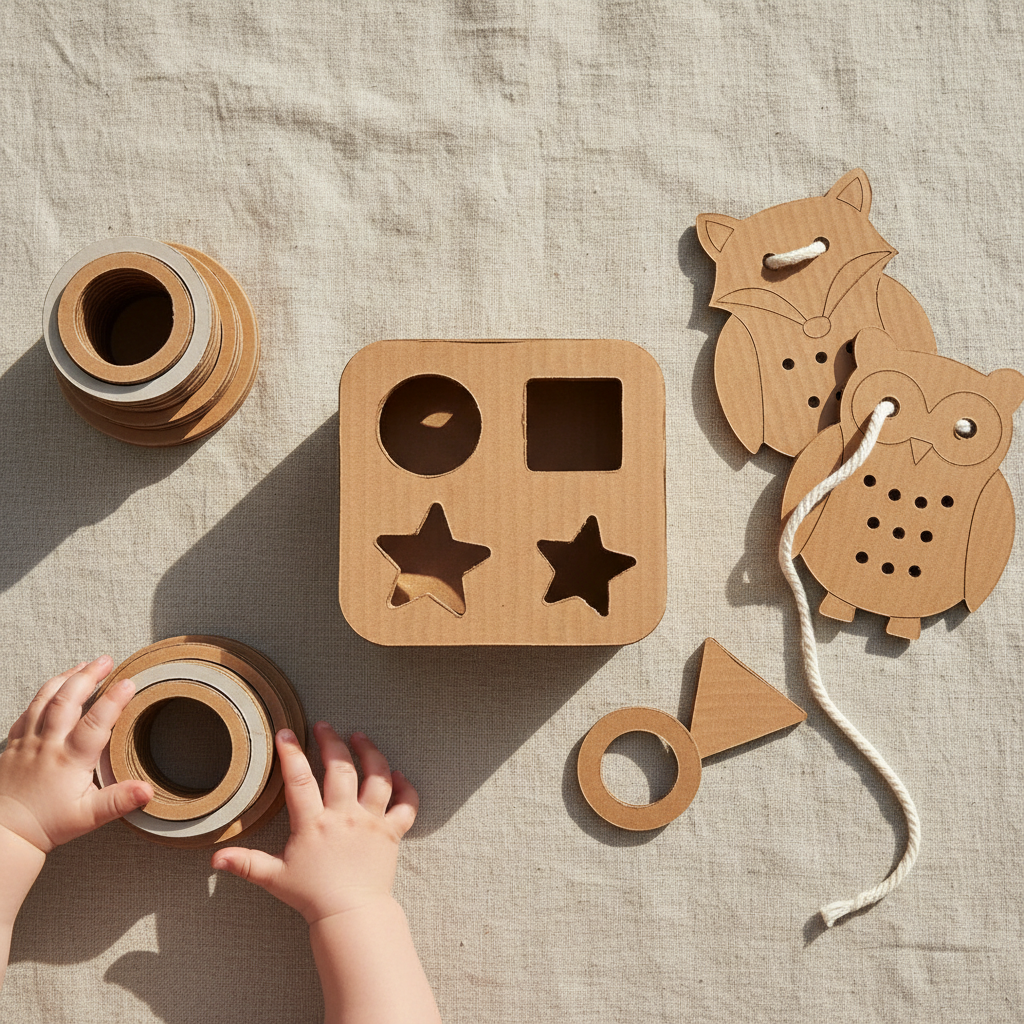
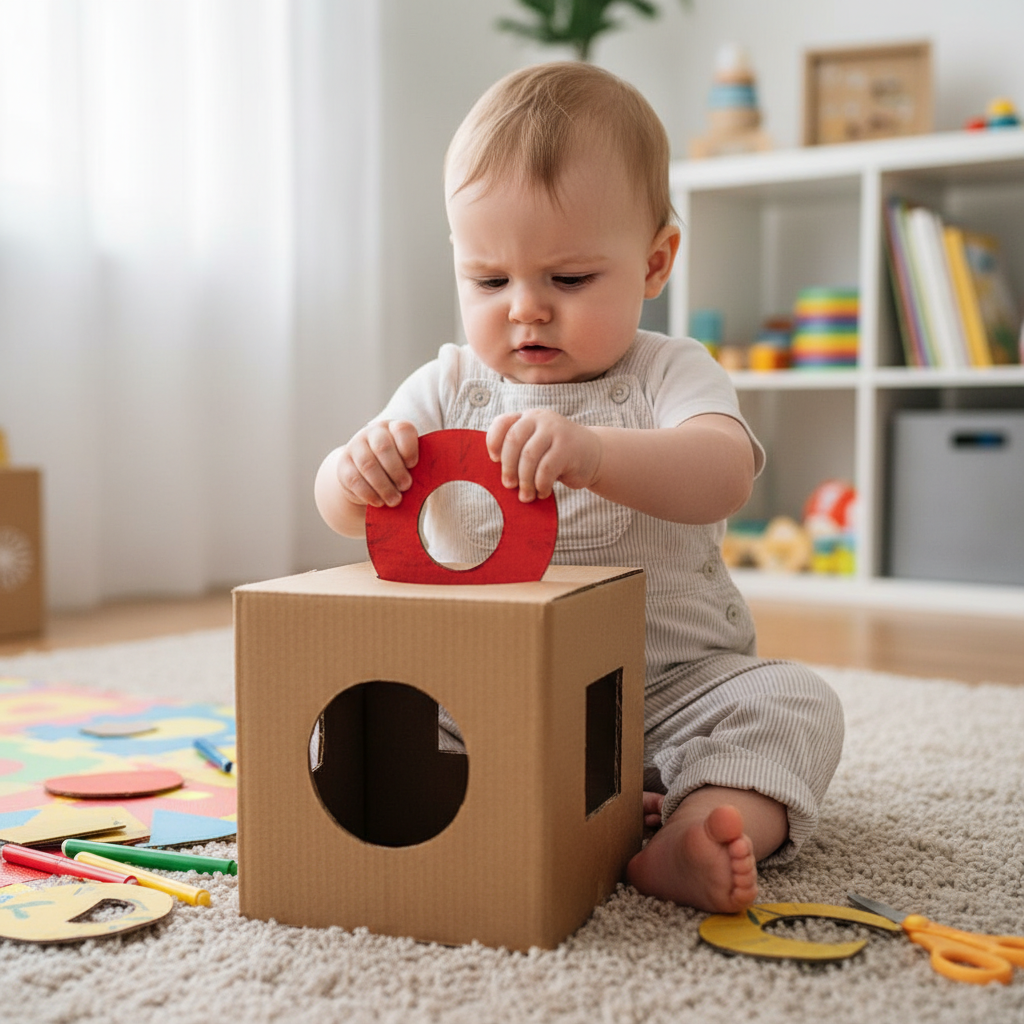
5. Simple Shape Sorter
This is a foundational toy for learning shapes and developing problem-solving skills and fine motor control.
- Materials: A cardboard box with a lid, a craft knife, a marker.
- On the lid of the box, trace 2-3 simple, distinct shapes: a circle, a square, a triangle. Keep them large and well-spaced.
- Carefully cut out the holes.
- From another piece of cardboard, cut out the corresponding shapes. Make them thick by gluing 2-3 layers of cardboard together. Sand the edges smooth.
- Your baby’s job is to match the shape to the hole. Start with just one shape and add more as they master it.
6. Ball Drop Box
This is all about cause and effect and repetition. Babies at this age love doing the same thing over and over again—it’s how they learn!
- Materials: A medium-sized rectangular cardboard box, cardboard tubes (from paper towels or toilet paper), hot glue, small balls (ping pong or wooden balls).
- Stand the box upright. Cut a hole in the top large enough for the balls to be dropped in.
- Inside the box, glue the cardboard tubes at various angles to create a ramp or a maze for the ball to travel down.
- Cut an opening at the bottom of the box where the ball will roll out.
- Let your little one drop the balls in the top and watch them come out the bottom.
Phase 3: Toys for Toddling Explorers (Ages 12-18+ Months)
Your baby is now a toddler! They’re mastering fine motor skills, walking, and exploring the world with incredible purpose. These toys challenge their dexterity and imagination.
7. Posting Box
This refines the hand-eye coordination needed to fit an object into a slot. It’s surprisingly captivating for toddlers.
- Materials: A small cardboard box or an old canister (like for oats), a craft knife, large craft sticks or old gift cards.
- Cut a thin, rectangular slot in the lid of the box or canister. Make it just wide enough for your ‘posting’ items to fit through.
- Show your toddler how to push the craft sticks or cards through the slot.
- They will love the satisfying ‘clink’ as the items drop inside and the challenge of getting the angle just right.
8. Lacing Cards
An excellent pre-sewing and pre-writing activity that builds fine motor skills, concentration, and the pincer grasp.
- Materials: Stiff, thin cardboard (like from the back of a notepad), a hole punch, a shoelace with a firm tip (the aglet).
- Cut the cardboard into various shapes—a simple square, a circle, or even an animal silhouette.
- Use the hole punch to make holes evenly spaced around the perimeter of each shape, about half an inch from the edge.
- Give your toddler the card and the shoelace and show them how to thread it through the holes.
9. Stacking Blocks
Who needs expensive wooden blocks? Cardboard offers a lightweight, safe alternative for early building adventures.
- Materials: Multiple small, identical boxes (like tea boxes, or cut your own from a larger box and tape them shut).
- Collect or create at least 5-10 small, cube-shaped or rectangular boxes. Make sure they are sturdy.
- You can leave them plain brown for a natural look or let your toddler help you paint them with non-toxic paints.
- Show them how to stack them up and, just as importantly, how to knock them down!
10. The Ultimate Box: A Play Tunnel or House
Never underestimate the power of a giant cardboard box. This isn’t just a toy; it’s a vehicle for imagination.
- Materials: A very large appliance box (from a refrigerator, washer, etc. – ask at local stores, they often give them away for free!).
- For a tunnel, simply open both ends and let your crawler go through.
- For a house, stand it upright. Cut out a door and a window or two. Let your toddler decorate it with non-toxic crayons or markers.
- This simple structure becomes a fort, a cave, a spaceship, a store—anything they can dream up. It’s the cheapest and most valuable toy you will ever own.
Conclusion
There you have it—10 incredible, development-boosting toys made from something you were probably going to throw away. You’ve learned that you don’t need to spend a dime to provide rich, engaging play experiences for your child. You’ve bypassed the consumer trap and invested your time and creativity instead of your cash. That’s not just frugal; it’s powerful.
Every time your baby masters that shape sorter or giggles as they crawl through their cardboard tunnel, you’ll know that you made it happen. You provided that learning opportunity with your own two hands. So the next time a big shipping box arrives at your door, don’t see it as recycling. See it as a blank canvas for your baby’s next great adventure. You’ve got the skills, you’ve got the power, now go make something amazing.